Chapter 1 was about a view moving. This one is about a view arriving and leaving, which turns out to be a different mechanism with its own failure modes — and the failures are much more common, because nothing can interpolate from "not existing."
An animation asks: this value went from A to B, what does the middle look like? A transition asks a harder question: this view was not here and now it is. There is no "before" to interpolate from. So SwiftUI needs you to describe what the view looks like when it does not exist, and then it animates from that description to the real thing.
Bench 2 puts twelve of those descriptions on one board and fires them at once.
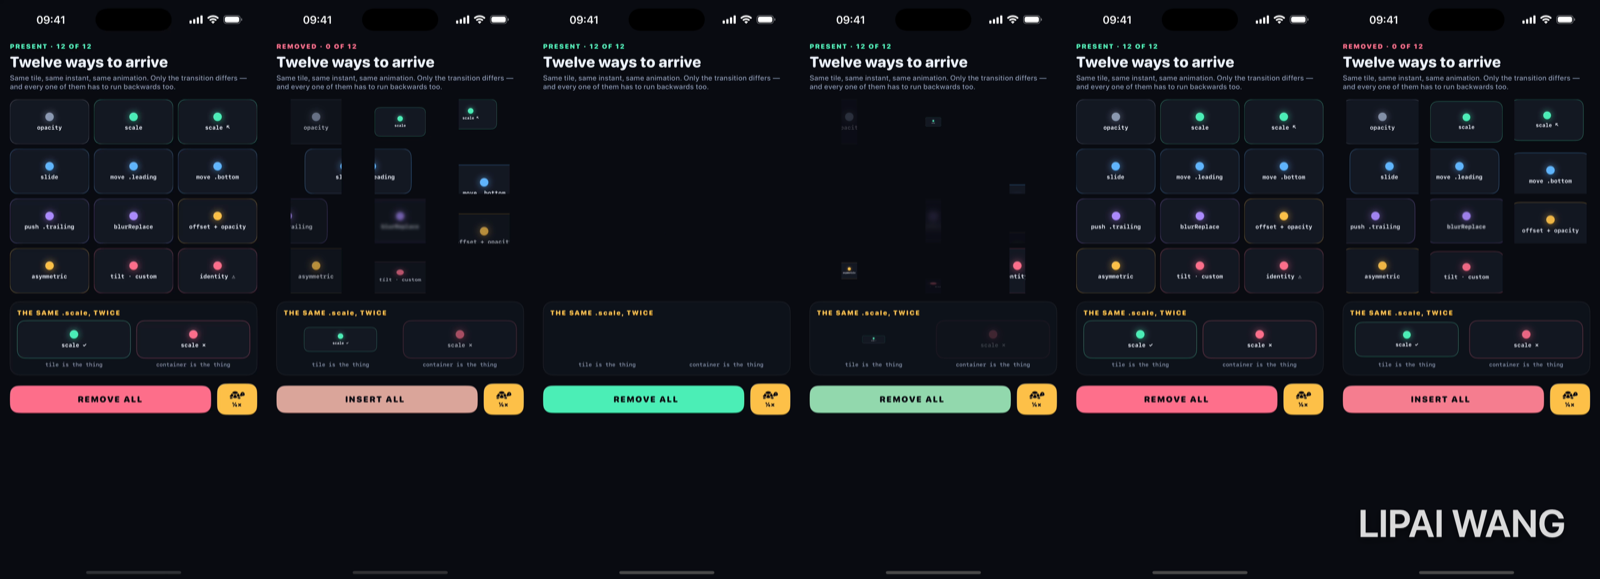
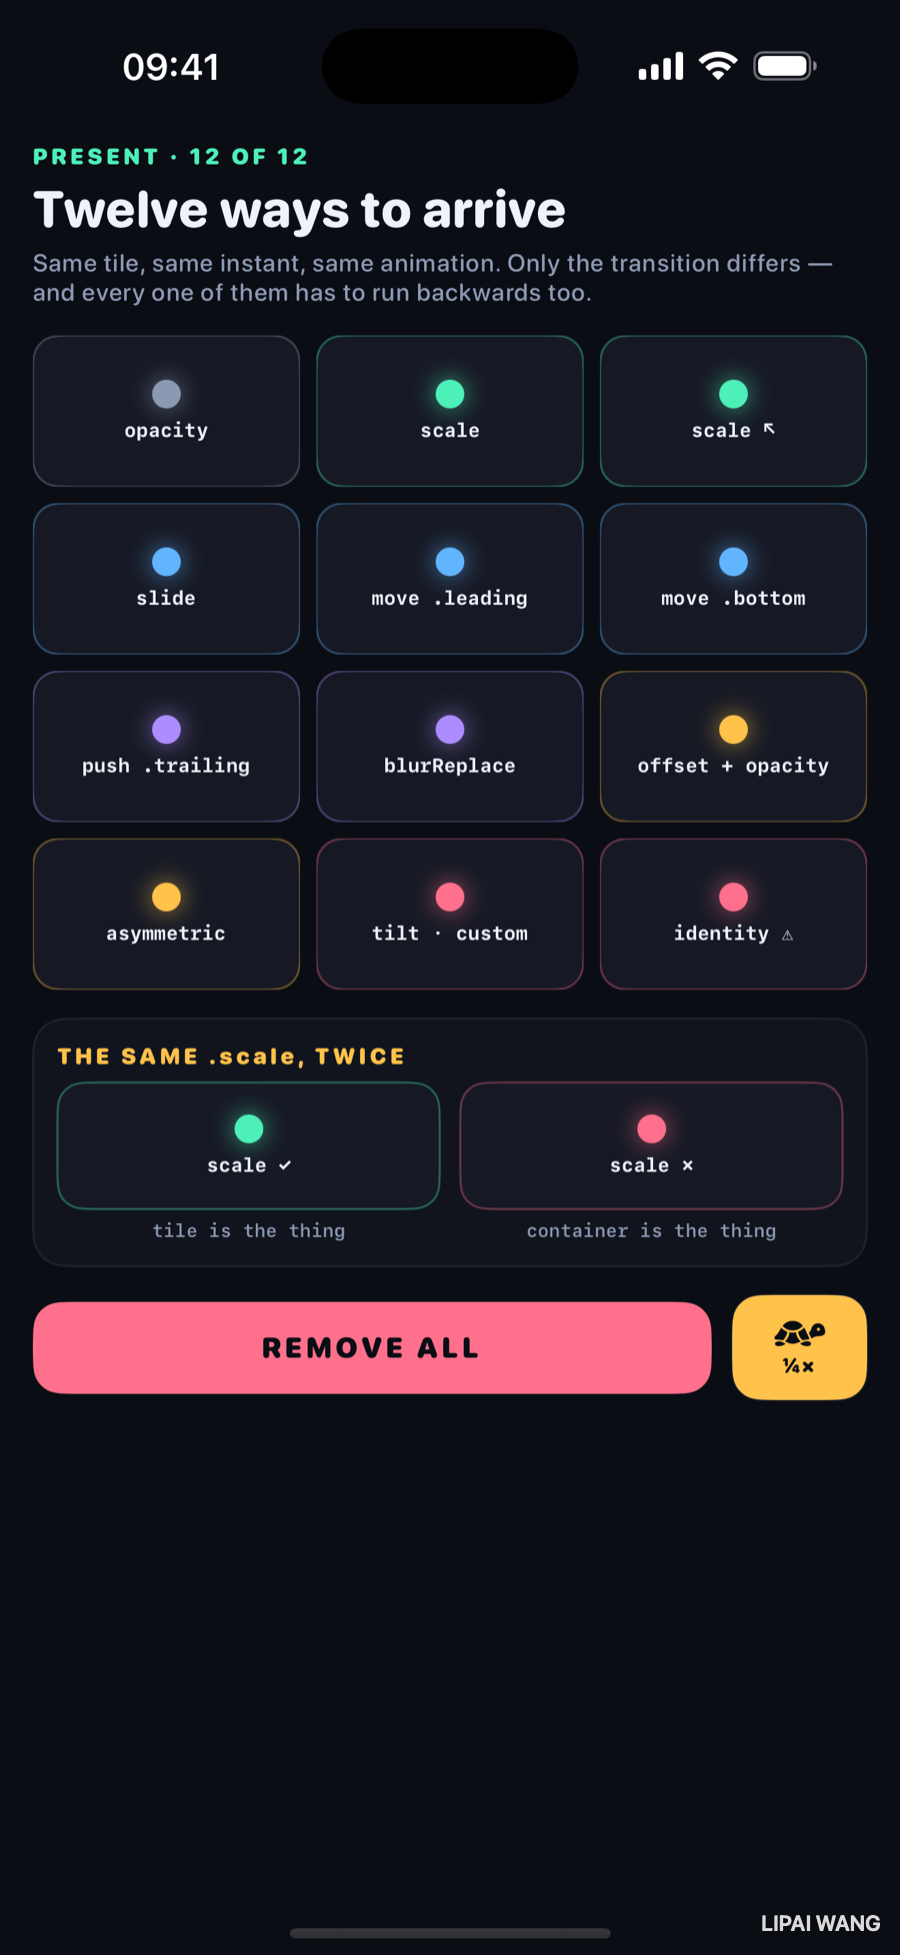
Twelve tiles. One state change. Same duration, same easing, same instant. The only difference between any two cells is the transition attached to it — and every one of them has to run backwards as well as forwards.
What a transition actually is
If a view stays in the tree and its offset changes, that is an animation. If the view was not in the tree and now is, that is a transition. They are different enough that a view can have both, and they run independently.
Which means the trigger for a transition is always structural. Something has to make a view come or go:
if present {
  Tile(label: "scale", tint: Lab.mint)
    .transition(.scale)
}
That if is doing the work. When present flips, the Tile genuinely leaves the tree, and .transition(.scale) is your description of what it looks like on the way in and out.
And there is a second requirement people trip over constantly:
present.toggle() on its own inserts and removes the view instantly, transition or no transition. The transition describes the shape of the change; an Animation supplies the time. With no animation in scope there is no time to spread the shape over, so the view pops.
withAnimation(.easeInOut(duration: 0.7)) { present.toggle() }This is why "I added .transition(.slide) and nothing happened" is the single most common SwiftUI transition question. Nine times out of ten the transition is fine and there is no animation wrapping the state change.
The board, mid-removal
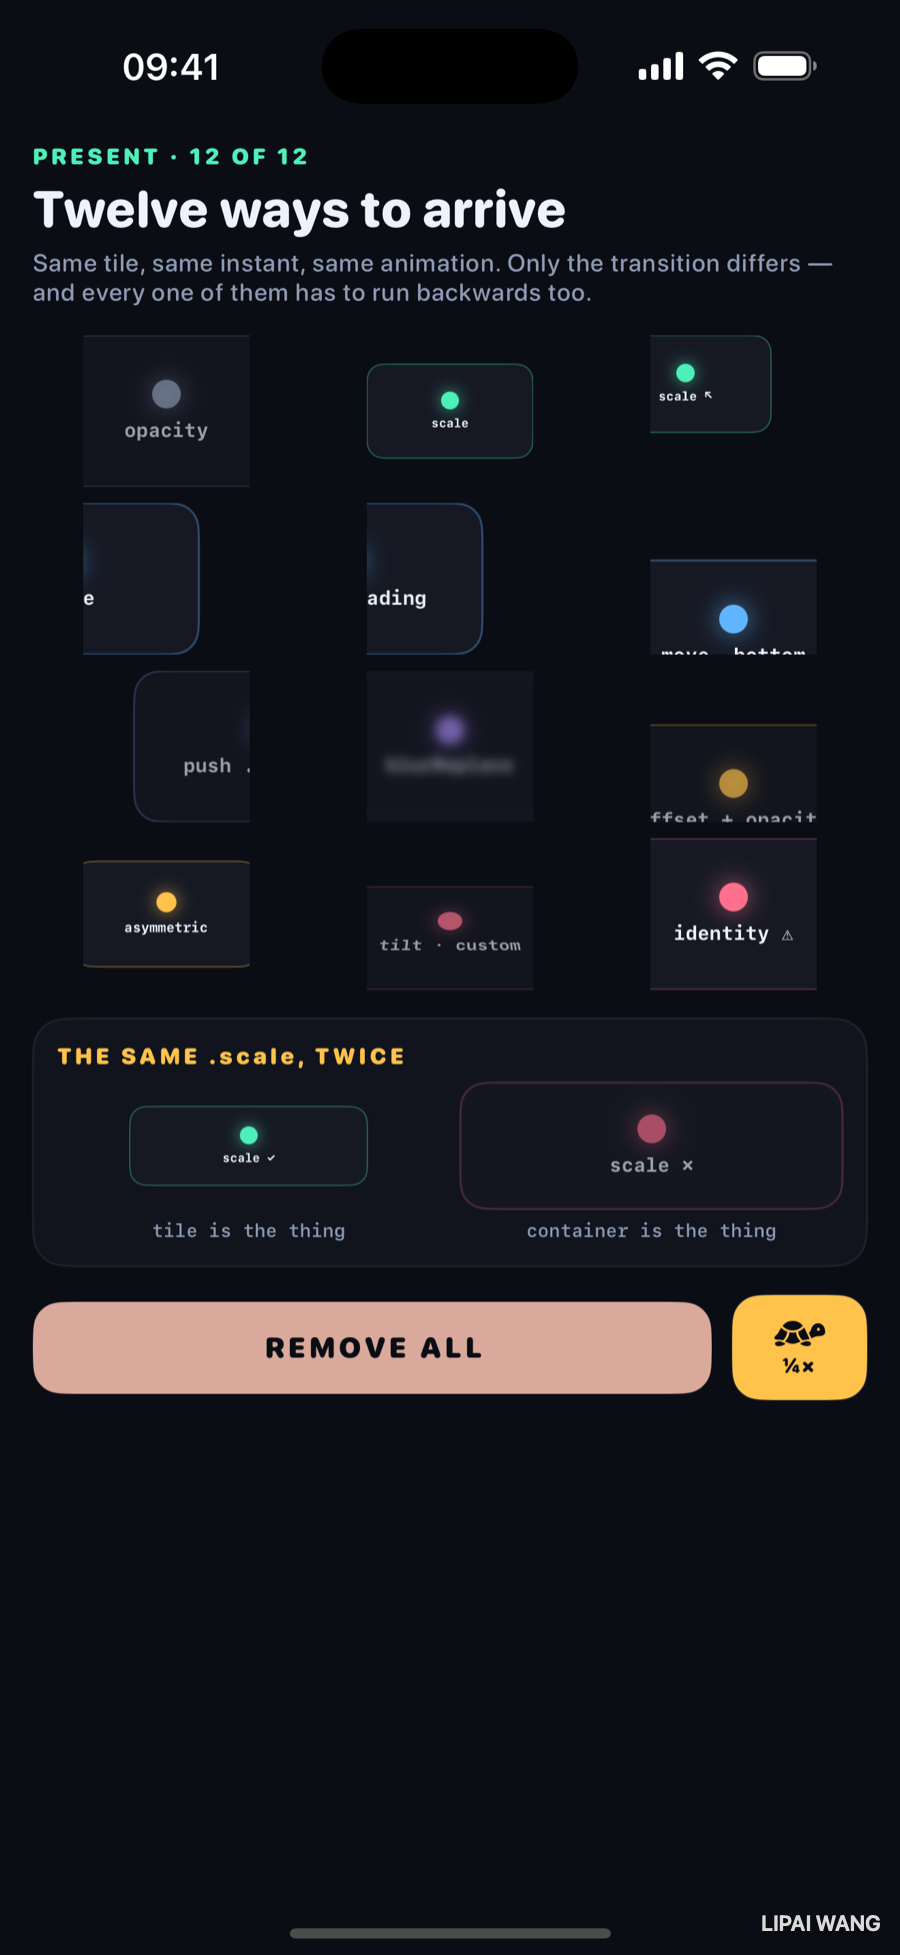
Here is one instant, 1.0 seconds into a 2.8-second quarter-speed removal, with every tile caught doing something different:
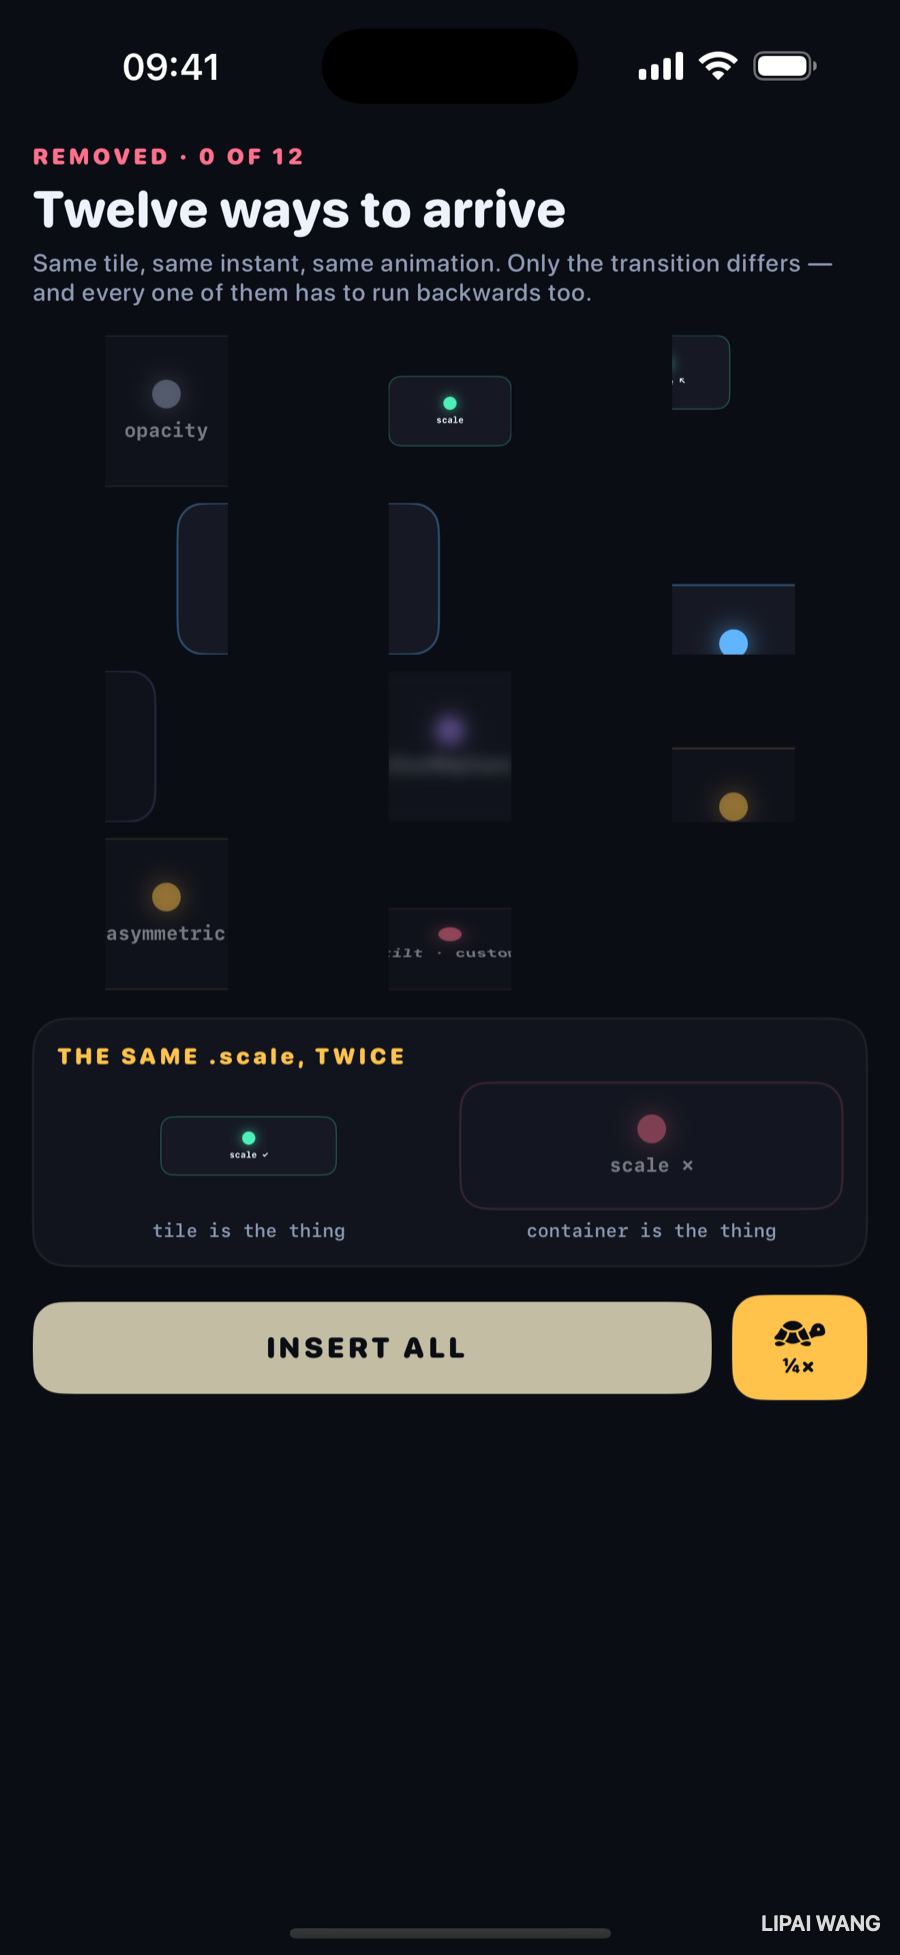
Reading left to right, top to bottom:
| Transition | What it does | Notes |
|---|---|---|
.opacity | Fades in place | The default — what you get if you attach nothing |
.scale | Grows from / shrinks toward its centre | |
.scale(scale:anchor:) | Same, toward a corner | anchor: .topLeading here |
.slide | In from leading, out to trailing | Direction is fixed for you |
.move(edge:) | In and out through one named edge | You pick the edge |
.push(from:) | Like move, but the outgoing view is pushed | iOS 17+ |
.blurReplace | Blurs out and blurs in | iOS 17+, and unmistakable in a still |
.offset(y:).combined(with: .opacity) | Two transitions at once | .combined(with:) composes any pair |
.asymmetric(insertion:removal:) | Different arrival and departure | Scales in, fades out |
custom Transition | Whatever you write | Tilts back in 3D here |
.identity | Nothing | The control — this is what a missing transition looks like |
The identity cell is worth dwelling on. In the frame above it is already gone while eleven neighbours are still mid-flight. That is not a bug in the demo; that is the entire experience of forgetting a transition, and it is useful to have it on screen next to eleven that work.
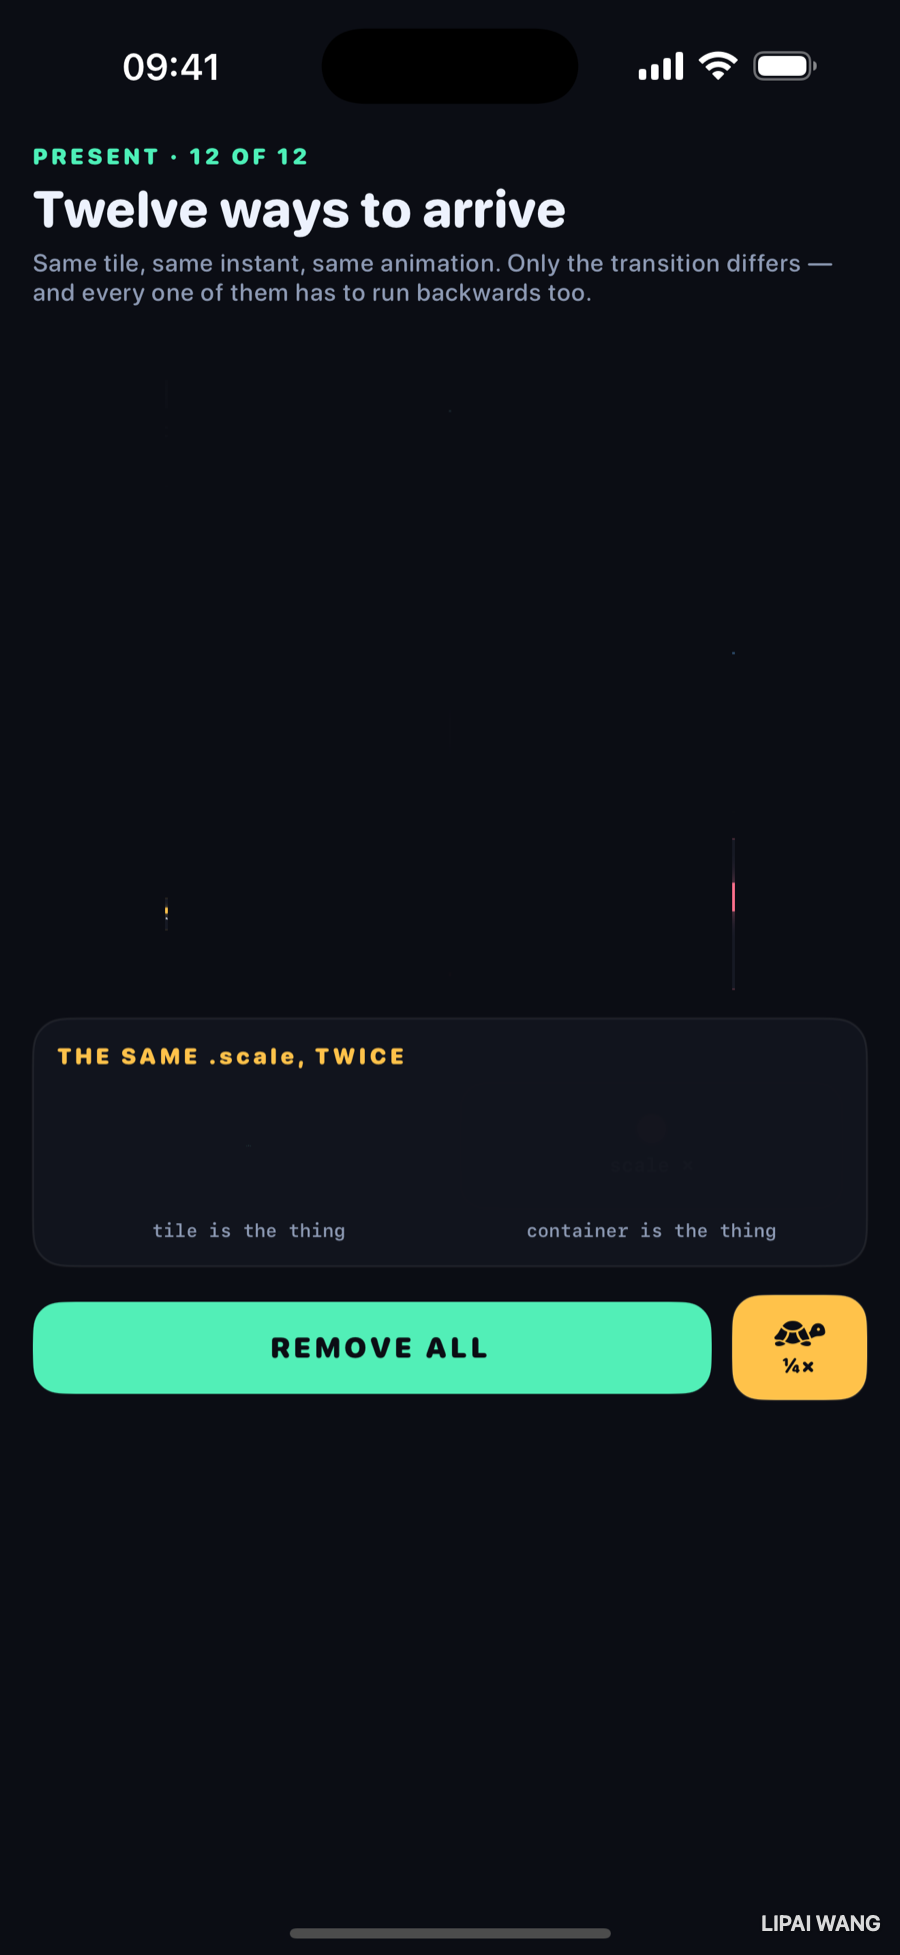
A beat later the board is empty, and every cell still holds its space:
Mini-exercise
Delete withAnimation from the toggle, leaving all twelve .transition modifiers exactly as they are. Run it. Every cell now behaves like the identity cell. Put it back. That is the difference between a transition and an animation in one keystroke.
Composing: combined and asymmetric
Two combinators cover most of what you will actually want.
.combined(with:) runs two transitions on the same view at the same time. It is not a list — it is a binary operator you can chain:
.transition(.offset(y: 70).combined(with: .opacity))Motion plus a fade is the workhorse. A view that only moves reads as being flung around; a view that only fades reads as flat. Together they read as arriving.
.asymmetric(insertion:removal:) is the one worth remembering, because entering and leaving are genuinely not the same event:
.transition(.asymmetric(insertion: .scale(scale: 0.2), removal: .opacity))Arriving is an announcement — the user should notice it, so a scale earns its keep. Leaving is housekeeping — the user has already moved on, and something bouncing on its way out reads as the app being slow to let go. A fade out is almost always right, and asymmetric is how you say so.
Watch the same board coming back the other way. The asymmetric cell is scaling up while its neighbours retrace whatever they did on the way out, and the identity cell is simply there again, having missed the event entirely:
insertion: something with character, removal: .opacity. If you only ever remember one thing about transitions, this is a better default than applying the same effect in both directions.
Writing your own
The modern way is the Transition protocol, and it is small:
/// `phase` is the only input: `.willAppear` before an insertion, `.identity`
/// while the view is simply present, `.didDisappear` after a removal. You
/// describe what the view looks like in each, and SwiftUI animates between them
/// — so one type covers both directions without you writing them separately.
struct TiltTransition: Transition {
  func body(content: Content, phase: TransitionPhase) -> some View {
    content
      .rotation3DEffect(.degrees(phase.isIdentity ? 0 : 78),
                        axis: (x: 1, y: 0, z: 0), anchor: .bottom)
      .opacity(phase.isIdentity ? 1 : 0)
  }
}
That is the whole custom transition on the board. phase.isIdentity is true only while the view is genuinely present; both the not-yet-arrived and already-departed phases fall to the other branch, so one expression describes both ends.
Because Move on this board stores AnyTransition, the custom one gets wrapped for storage:
extension AnyTransition {
  static var tilt: AnyTransition { AnyTransition(TiltTransition()) }
}Before the Transition protocol, a custom transition was a ViewModifier plus a pairing:
struct TiltModifier: ViewModifier {
  var active: Bool
  func body(content: Content) -> some View {
    content.rotation3DEffect(.degrees(active ? 78 : 0),
                             axis: (x: 1, y: 0, z: 0), anchor: .bottom)
  }
}

let tilt = AnyTransition.modifier(
  active: TiltModifier(active: true),
  identity: TiltModifier(active: false)
)
Same idea — describe the active (not-present) state and the identity (present) state, and let SwiftUI animate between them. Most existing code and most written material still uses this form, so it is worth being able to read. Write new code against Transition: it is one type instead of two, and phase can distinguish arriving from leaving, which active: Bool cannot.
The trap: the same .scale, twice
This is the part of the chapter I would keep if I had to throw the rest away.
Two tiles. Both ask for .scale. Both are written by someone who has read the documentation. One of them scales and one of them fades:
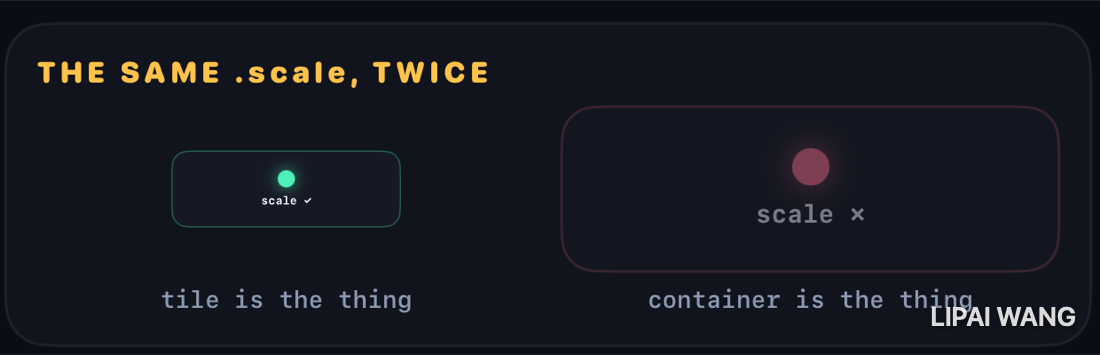
Here is the code, in full, with nothing hidden:
// Left — scales.
if present {
  Tile(label: "scale ✓", tint: Lab.mint)
    .transition(.scale)
}

// Right — fades.
if present {
  VStack {
    Tile(label: "scale ✗", tint: Lab.rose)
      .transition(.scale)
  }
}
The only difference is a VStack that appears to do nothing.
On the left, the Tile is the thing appearing, so its .transition(.scale) runs.
On the right, the VStack is the thing appearing. The Tile is not independently arriving — it is a passenger inside a container that arrives as a unit. The VStack has no transition of its own, so it takes the default fade, and the Tile's .scale never gets a say.
Nothing about the tile's own code is wrong. That is exactly why this one costs people an afternoon: you stare at the modifier, which is correct, instead of at the structure, which is not.
The fix is to put the transition on whatever the if actually controls:
if present {
  VStack {
    Tile(label: "scale ✓", tint: Lab.rose)
  }
  .transition(.scale)   // on the container — the thing being inserted
}
Once you have seen it, you start recognising the family: a transition inside a Group, inside a ForEach row wrapper, inside a .background, inside any view you added for layout and stopped thinking about. Same cause every time. Before debugging the transition, ask what is the outermost view this if adds and removes — and put the transition there.
Mini-exercise
Move .transition(.scale) from the tile to the VStack on the right-hand slot and run the board. Both tiles now scale identically. Then wrap the left tile in a Group and watch it break in the same way. Group is not a layout container and adds no visual anything, and it still steals the transition — which tells you this is about view identity, not about layout.
Two things the board had to get right to be readable
Neither is really about transitions, and both bit during the build.
Reserve the space. Each cell holds its 74-point height whether or not the tile is in it:
ZStack {
  if present { Tile(…).transition(move.transition) }
}
.frame(height: 74)
Without the fixed frame the grid reflows as tiles leave, so every remaining tile slides toward the gap at the same time as the leaving tiles run their transitions. Two animations fight, and the result is mush. Reserving the space means the transition is the only motion on screen — which is what you want in a demo and usually what you want in a product.
Clip per cell, not per board. The first version clipped the whole grid, and the .move and .push tiles slid straight across their neighbours on the way out:
.frame(height: 74)
// Clipping per cell, not per board: without it a `.move` or `.push`
// slides straight across its neighbour on the way out. The clip is what
// makes an edge transition read as leaving *this* slot.
.clipped()
An edge transition only reads as leaving if there is an edge to leave through. The clip is not decoration — it is what makes the metaphor land. This is the same lesson as chapter 1's overshoot gutter, from the other direction: transitions that move need to be told where the world ends.
A bug the demo handed me: text that smears
The first recordings had a defect that had nothing to do with transitions. The status line and the button label came out as double-exposures — REMOVED · 0 OF 12 overprinted on PRESENT · 12 OF 12.
The cause is that changing a Text's string inside withAnimation is also a change SwiftUI wants to animate, and its default for replacing text content is a cross-fade. In motion it is a nice touch. In a still frame it looks like a rendering fault.
Text(present ? "PRESENT · 12 OF 12" : "REMOVED · 0 OF 12")
  .contentTransition(.identity)
contentTransition controls how a view animates a change to its content, as opposed to its insertion or removal. .identity means swap instantly. It is also where .numericText() lives, which is the counter-rolling effect you have seen on timers and scores.
.animation/withAnimation— this value changed; how long, and what shape?.transition— this view arrived or left; what does "not there" look like?.contentTransition— this view's content changed but the view stayed; how should the swap read?
Reaching for the wrong one of these is most of what goes wrong with SwiftUI motion, and they are easy to confuse because all three are triggered by the same withAnimation.
Challenges
-
Make the departures quiet. Give every tile on the board
.asymmetric(insertion:removal: .opacity), keeping its current effect as the insertion. Run the cycle. The board now feels calmer on the way out and just as lively on the way in — that asymmetry is a real product decision, not a trick. -
Break each one on purpose. Wrap three different tiles in a
Group, aVStack, and aZStack. Predict which ones lose their transition before you run it. -
Write a phase-aware custom transition.
TiltTransitiononly checksphase.isIdentity, so it tilts the same way in both directions. Use the fullTransitionPhase—.willAppearand.didDisappearare distinguishable — to make it tilt forward on the way in and backward on the way out. That is an asymmetric transition written as one type. -
Remove the reserved height from the grid cells and run the removal. Watch the reflow fight the transitions. Then reintroduce it. This is the fastest way to understand why "animate the layout" and "animate the arrival" should not happen at once.
-
Stagger the board. Give each tile
.animationwith a delay derived from its index so the twelve leave as a wave instead of together. Then ask whether the wave made the comparison easier to read or harder — and keep the answer in mind next time you stagger a real list.
Key Points
- A transition is insertion and removal, not change. Something structural — usually an
if— has to add or remove the view. - A transition needs an animation in scope. Without
withAnimation(or an.animationmodifier covering the change) the view pops, however good the transition is. - The default is a fade. Attaching nothing gives you
.opacity;.identitygives you nothing at all. .combined(with:)composes;.asymmetric(insertion:removal:)splits. Motion plus opacity is the workhorse; character on the way in and a plain fade on the way out is a better default than symmetry.- Custom transitions are one
Transitiontype with aphase, which distinguishes arriving from leaving. The olderAnyTransition.modifier(active:identity:)pairing is what most existing code uses and cannot tell the two directions apart. - A transition belongs to the outermost view the
ifadds or removes. Wrap a view in anything —VStack,Group,ZStack— and that wrapper becomes the thing being inserted, taking the default fade with it. - Reserve the space and clip the slot. Layout reflow competing with a transition reads as mush; an edge transition with nothing to leave through reads as nothing at all.
.contentTransitionis a third thing, for content changing inside a view that stays put —.identityto stop text cross-fading,.numericText()for rolling digits.
The next bench takes the case neither chapter covers: a view that is neither moving nor arriving, but becoming — the same conceptual thing rendered in two different places, handed off between them. That is matchedGeometryEffect, and it fails in ways that look nothing like either of these.
Read next
Ship your apps faster
When you're ready to publish your Swift app to the App Store, Simple App Shipper handles metadata, screenshots, TestFlight, and submissions — all in one place.
Try Simple App Shipper